Snowkiting: what it is, where to do it and the equipment needed for this extreme
  The 7 best kites of 2025
  Surfskate: what it is, how it works and how to choose the ideal surfskate board
  How to choose a Wing Foil board: a guide for beginners and intermediate riders
  The 5 best all-round wing foil wings of 2025
Basic wing foil techniques for beginners: tips for getting started
Wing foil has become a trendy discipline in the world of watersports. It allows you to sail free, be carried by the wind and have as much fun in the waves as in flat water, giving you the feeling of being at one with the sea and the sky. One of the strengths of wing foil compared to kite or windsurfing is that the basic equipment is more basic and relatively easy to assemble and handle. There are no odd components such as lines, bars, masts or booms. You don't even need a harness and the whole wing structure is flexible, light and allows you to sail for hours gliding on the surface of the water thanks to the foil.
All you have to do to start wing foiling is inflate the wing, grab the board and get in the water. Let's see in this wing foil beginner's guide how to approach this fantastic discipline, handle the equipment and learn the basic techniques to sail safely and have fun.
Where to start practising Wing Foil? Equipment, clothing and safety gear

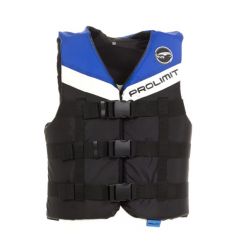
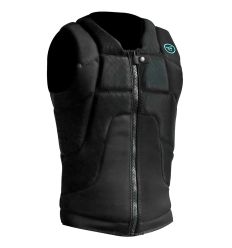
Wing foil can be practised in the sea, on lakes and lagoons, in flat water conditions as well as in waves. As with other watersports, it is generally important to have good aquatics and to know how to swim. It is advisable from the start of learning to wear a life jacket with a minimum of 50 Newtons buoyancy, a helmet, and an impact vest to protect the abdomen and back from blows and falls. Finally, you may need a neoprene wetsuit of varying thickness, depending on the temperature outside and in the water, as well as a pair of socks or booties, also in neoprene, to protect your feet from the sharp blades of the foil when swimming alongside the board.
To get off to the right start, it is essential to purchase the right wing foil equipment. A good starting point is to invest in a wing foil board suitable for your level or choose a set with all wing foil equipment, including wing, foil and essential accessories.
You can also start practising wing foil on your own, perhaps with the help of the many video tutorials you can find on the web. The ideal, however, would be to take at least the first lessons in a specific school with qualified instructors. It is certainly a faster and safer learning path.
Know the spot and study the weather

Although the wing foil allows you to go out in medium-light wind conditions, from 8-10 knots, before a session you should always study the current and check the weather forecast for the day, as the wind, as well as currents and waves, can always change both in direction and intensity. Another piece of advice before entering the water, especially if you do not know the spot, is to observe the other riders and perhaps have them explain any dangers you may find in the water: rocks, holes, eddies, undertow currents, etc.
The advice is to learn wing foiling in light to medium wind conditions and in a spot that is not exposed to waves and breakers. It is easier to start in a side on-shore wind to avoid being pushed out to sea. Finally, it is best to learn in shallow water so as to get on the board easily, but also in water that is deep enough so as not to touch the bottom with our foil.
First goal of the wing foil beginner: the “waterstart”

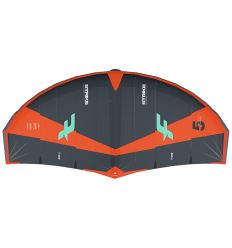
The first goal as a wing foil beginner is to learn how to steer the wing. It can be useful to start on the beach to get used to handling the wing on the ground and to understand how to increase or decrease power. It is definitely easier to start with a big wing, say from 5m upwards, such as the F-One Strike V4.
Once you are able to move slowly on the water, start concentrating on getting on the foil and then practise the so-called “waterstart”.
To practise “waterstart”, beginners should buy wing foil boards with a large volume, such as the Duotone Sky Start, which provides great stability and good buoyancy.
This way one can concentrate on controlling the wing without worrying about balancing on the board while trying to start. A good rule of thumb is to have about 30-40 litres more volume than your body weight. For example, if you weigh 80 kg, choose a board with at least 120 litres, such as the RRD Air Beluga Y27, which provides the ideal stability to focus exclusively on learning the foil without having to worry about the board.
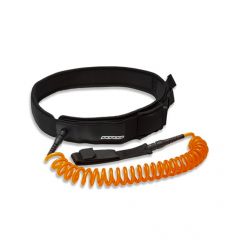
The objective of the “waterstart” is to get on the board, first on your knees and then standing up. Once standing on the board you have to pump the wing hard to get into the glide. As you pick up speed, you take the board out of the water on the foil and use the wing to help keep your balance. If you make a mistake the first few times, don't worry: recovering both board and wing after a fall is easy thanks to the respective wing foil leash that should always be worn. At the beginning during the first few attempts to “waterstart” you will drift a lot, losing water downwind. Don't worry, move about 200-300 metres close to the coast and if you can't get upwind on board, get off the foil, swim with your equipment back to the beach and start again from the starting point.
Second objective for learning wing foil: upwind and changes of direction

Once you are able to glide and stay on the foil, the next goal is to go upwind. To do this, the efficiency of the foil will help you close tighter and tighter angles as you master the technique. Very important, apart from the position of the wing, is the body trim and above all looking in the direction you want to go, so head and shoulders turned towards the wind!
Finally, there is work to be done on direction changes. Changing direction on a wing foil with a jibe, i.e. moving the bow of the board away from the wind, usually requires a few practice sessions. At first it will mean losing the “lift” and dropping the board back on the water to complete the manoeuvre. If you fall into the water while attempting to gybe, you can easily reposition yourself and your equipment and start off in the new direction. With time, you will learn to complete the jibe without interrupting the “flight” over the water. You can also change direction on the wing foil by learning how to tack, i.e. by turning the bow of the board into the wind, although this is already a more advanced technique. Everything in its own time, the important thing is to get started!
Photo Credit:
Photo 1: NAISH
Photo 2: CABRINHA
Photo 3: NORTH
Photo 4: NEILPRYDE
Photo 5: RRD